Microsoft MFA Registration options.
Please select from one of the options listed below to register for Microsoft MFA. It is recommended to register two devices, i.e. authenticator app and a phone number.
Option 1: Registration of phone number for Microsoft MFA
Option 2: Registration of Authenticator for Microsoft MFA
Option 3: Registration for New Users – select this option if you do not use Symantec VIP or Azure MFA currently.
Option 1: Registration of phone number for Microsoft MFA
Step1:
On your PC go to: Registration Site
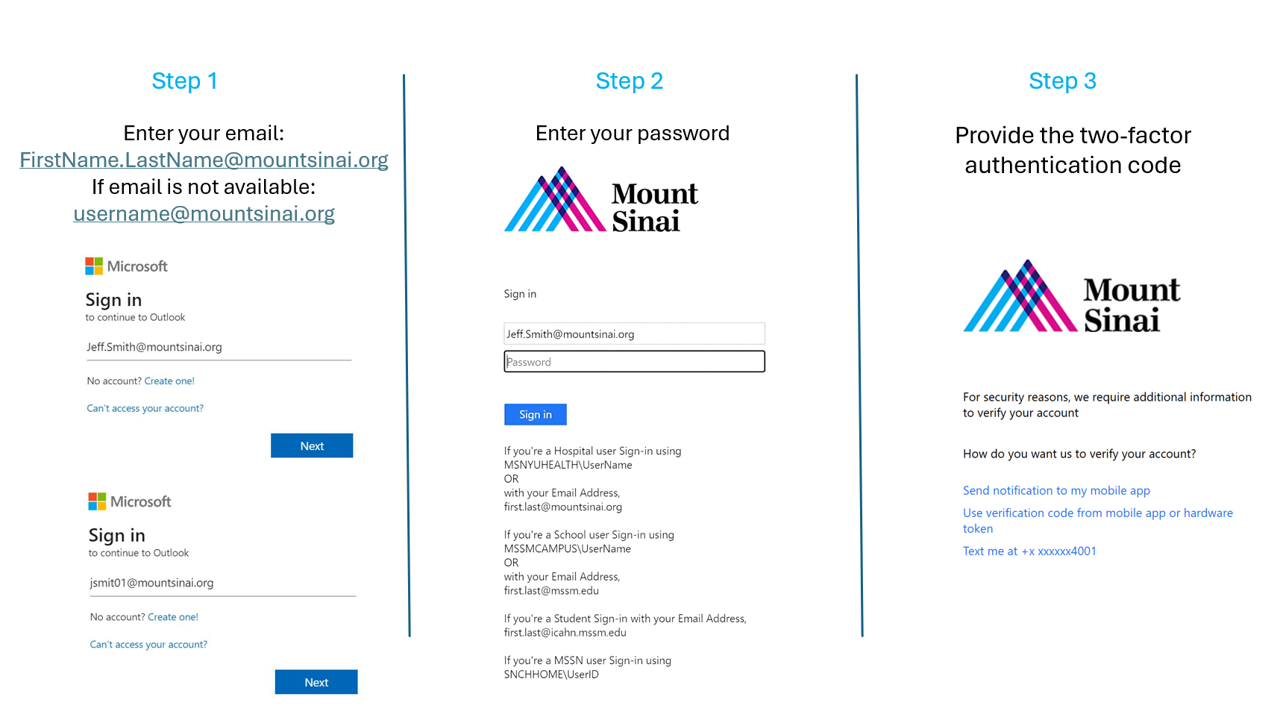
Sign in using your email. If you do not have email, use username@mountsinai.org or username@mssm.edu.
Click Next.
Step 2:
Enter your password and click Sign In.
Step 3:
Provide two-factor authentication.
Step 4:
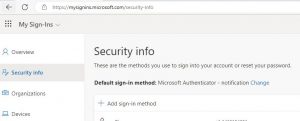
Successful login will take you to the window shown. Select ‘Security Info’ link on the left column.
Step 5:
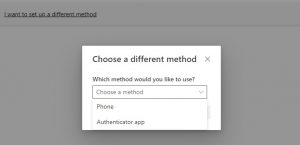
To add a device, click on ‘+ Add sign-in method’. Select Phone

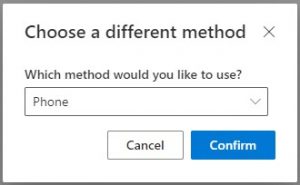
Select Phone from the drop down menu and Confirm.
Step 6:
Select your country and enter your phone.
Note: You have option to select other countries besides United States.
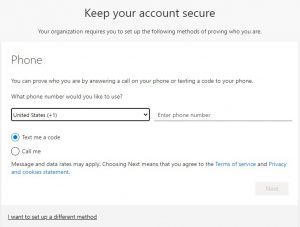
Step 7:
You will receive an SMS with a 6 digit code (or called to verify).
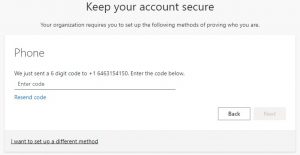
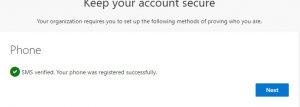
Once you enter the 6 digit code and click Next, you will see a successful registration message.
To Delete a device:
To delete a device. Click on ‘Delete’ (to the right of registered device)

To change default sign-in method
Click ‘Change’. Select from the drop-down options.

Option 2: Registration of Authenticator for Microsoft MFA
Step1:
On your PC go to: Registration Site
Sign in using your email. If you do not have email, use username@mountsinai.org or username@mssm.edu. Click Next.
Step 2:
Enter your password and click Sign In.
Step 3:
Provide two-factor authentication.

Step 4:
Successful login will take you to the window shown. Select ‘Security Info’ link on the left column.

Step 5:
To add a device, click on ‘+ Add sign-in method’. Select Authenticator App or Phone

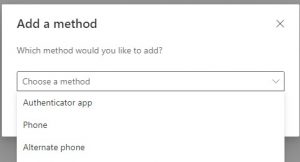
Step 6:
Register Microsoft Authenticator app. (To Register Phone skip to Step 11.)
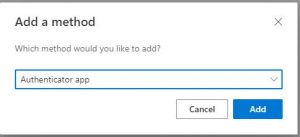
On browser window click Next two times.
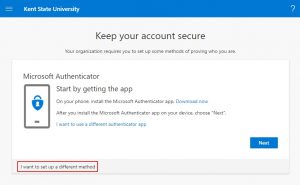
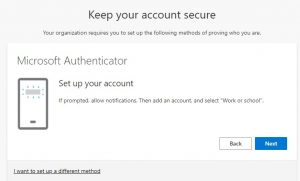
On your cell phone – Download and Install the latest version of the Microsoft Authenticator app (recommended).
To install the Authenticator app on an Android device, scan the QR code below or open the download page from your mobile device.

To install the Authenticator app on For iOS, scan the QR code below or open the download page from your mobile device.

Step 7 – from your cell phone\smart device:
Open the Microsoft Authenticator app on your smart phone, click ‘+’ and select ‘Work and school account’
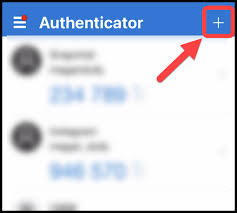

Step 8 – from your cell phone\smart device:
Click Scan QR Code
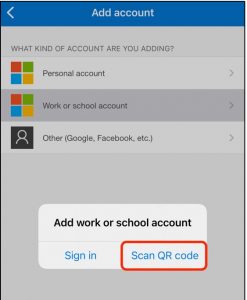
Step 9:
Scan the QR code on your PC browser window from your Authenticator app on the phone.
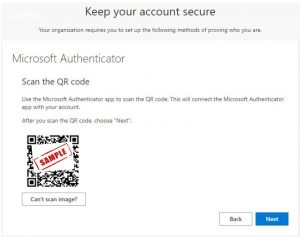
Click Next on your browser window.
Step 10:
You should be prompted on your phone to do the number matching. Click Yes on the phone after entering the numbers from the browser.
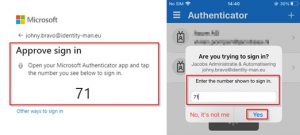
On your PC click Next to register your device.
You should see Success!
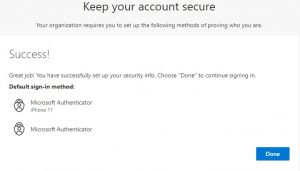
To Delete a device:
To delete a device. Click on ‘Delete’ (to the right of registered device)

To change default sign-in method
Click ‘Change’. Select from the drop-down options.

Option 3: Registration for New Users to Azure MFA.
Authenticator Application registration video:
Follow these steps if you have NOT used Symantec VIP and Azure multi factor authentication before.
Step1:
On your PC go to: Registration Site
Sign in using your email. If you do not have email, use username@mountsinai.org or username@mssm.edu.
Click Next.
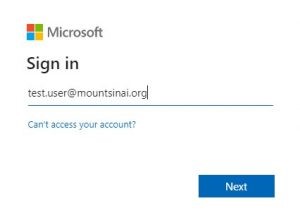
Step 2:
Enter your password and click Sign In.
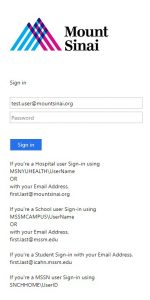
Step 3:
If you have not registered for Azure MFA, you will see the window to the right.
Click Next.
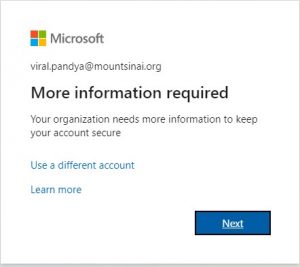
Step 4:
To register Microsoft Authenticator (recommended), Click Next.
To register Phone number, Click on ‘I want to set up a different method’ – shown in red box. Go to Step 10. .

Step 5:
Register Microsoft Authenticator app.
On browser window click Next

On your smart phone – Download and Install the latest version of the Microsoft Authenticator app (recommended).
To install the Authenticator app on an Android device, scan the QR code below or open the download page from your mobile device.

To install the Authenticator app on For iOS, scan the QR code below or open the download page from your mobile device.

Step 6:
Open the Microsoft Authenticator app on your smart phone, click ‘+’ and select ‘Work and school account’


Step 7:
Click Scan QR Code

Step 8:
Scan the QR code on your PC browser window from your Authenticator app on the phone.

Click Next on your browser window.
Step 9:
You should be prompted on your phone to do the number matching. Click Yes on the phone after entering the numbers from the browser.

On your PC click Next to register your device.
You should see Success!

Step 10:
Phone\SMS Registration
Select Phone from the drop down menu and Confirm.


Step 11:
Select your country and enter your phone.
Note: You have option to select other countries besides United States.

Step 12:
You will receive an SMS with a 6 digit code (or called to verify).

Once you enter the 6 digit code and click Next, you will see a successful registration message.

To Delete a device:
To delete a device. Click on ‘Delete’ (to the right of registered device)

To change default sign-in method
Click ‘Change’. Select from the drop-down options.

Help for Microsoft MFA registration.
The Mount Sinai Hospital and Mount Sinai Queens: 212-241-4357
The Icahn School of Medicine at Mount Sinai: 212-241-7091
Mount Sinai Beth Israel, Mount Sinai Brooklyn, Mount Sinai St. Luke’s and Mount Sinai West: 212-523-6486
