In coming months, Azure MFA will be required to log in to any application requiring two-factor authentication. It is advised to setup a two different authentication methods, i.e. Authenticator app and a Phone\SMS.
Follow steps 1-12 if you have Symantec VIP token already registered with MSHS and are looking to register or update Azure MFA.
Follow steps 13-22 if you have not registered for Symantec VIP or Azure MFA.
|
Steps |
Action |
Illustration |
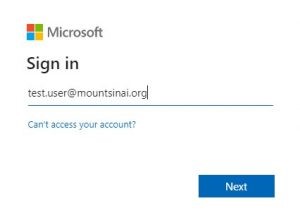
| 1 | From a web browser, go to:
Sign in using your email. If you do not have email, use username@mountsinai.org or username@mssm.edu. Click Next. |
 |
| 2 | Enter your password and click Sign In. | 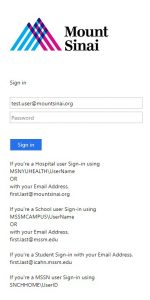 |
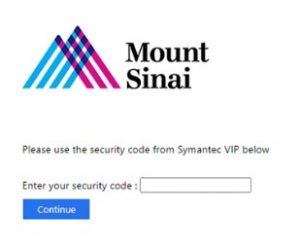
| 3 | If you were previously registered for Symantec VIP token, you may get prompted with screen on right. Enter the 6 digit token.
If your Symantec VIP token is not working please reach out to Service Desk. Hospital DTP Service Desk (212) 241-4357 — Mount Sinai Hospital and Mount Sinai Queens (212) 523-6486 — Mount Sinai Beth Israel, Mount Sinai Brooklyn, Mount Sinai Morningside and Mount Sinai West (212) 979-4273 — New York Eye and Ear Infirmary of Mount Sinai School DTP Service Desk/Academic DTP Support Center (212) 241-7091 — Icahn School of Medicine at Mount Sinai (After hours leave a detailed message for next-day service from our technicians.) call helpdesk and they will assist you. |
 |
| 4 | Successful login will take you to the window shown. | 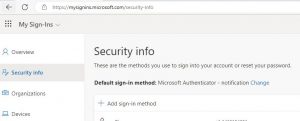 |
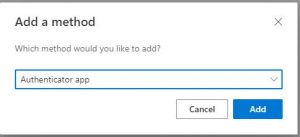
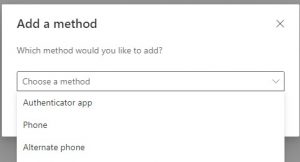
| 5 | To add a device, click on ‘+ Add sign-in method’. Select Authenticator App.
To register Phone number, Go to Step 10. Click Add.
|

|
| 6 | Click Next | 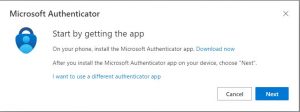 |
| 7 | Method 1:
Microsoft Authenticator App On your smart phone – Download and Install the latest version of the Microsoft Authenticator app (recommended).
|
Android – Scan QR code. Or go to Google Play to download and install the Authenticator app. Or go to Google Play to download and install the Authenticator app.
Apple iOS – Scan QR code |
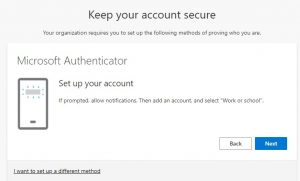
| 8 | Click Next on your browser window.
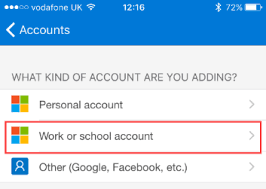
Open the Microsoft Authenticator app on your smart phone and click ‘+’ and then ‘Work and school account’
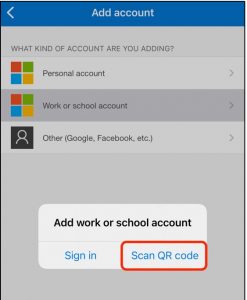
Click Scan QR Code |
|
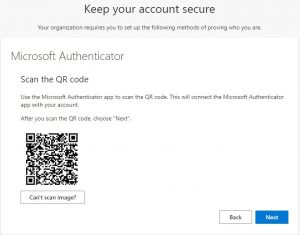
| 9 | Scan the QR code on your browser window from your Authenticator app on the phone.
Click Next on your browser window. Note: the QR code on right is unique for each account. Do NOT scan.
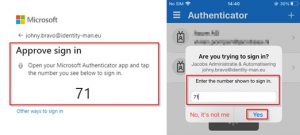
You should be prompted on your phone to do the number matching. Click Yes on the phone after entering the numbers from the browser.
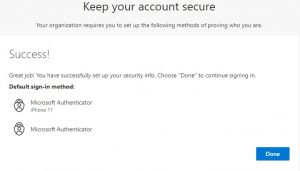
Click Next on browser to register your device. You should see Success! |
|
| 10 | Method 2:
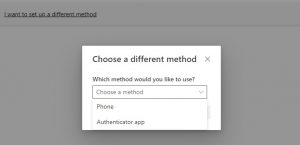
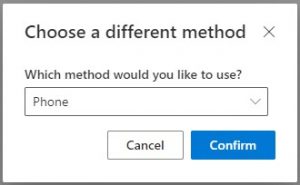
Phone\SMS From your browser window, select Phone from the drop down menu and Confirm. |
  |
| 11 | Select your country and enter your phone.
Note: You have option to select other countries besides United States. |
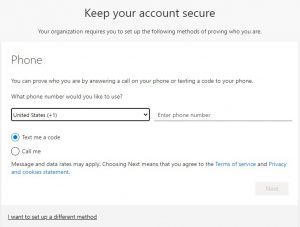
|
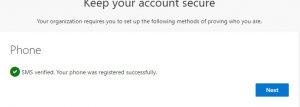
| 12 | You will receive an SMS with a 6 digit code (or called to verify).
Once you enter the 6 digit code and click Next, you will see a successful registration message. |
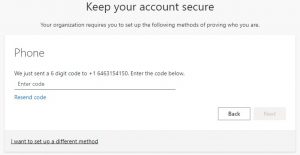
|
 Or go to the App Store to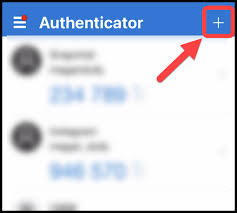

Follow steps 13-22 if you have not registered for either Symantec VIP or Azure MFA.
| 13 | From a web browser, go to:
Sign in using your email. If you do not have email, use username@mountsinai.org or username@mssm.edu. Click Next. |
|
| 14 | Enter your password and click Sign In | |
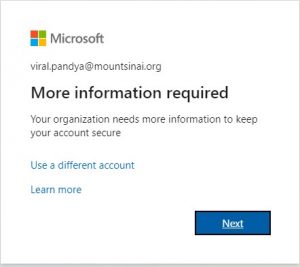
| 15 | If you have not registered for Azure MFA, you will see the window to the right.
Click Next. . |
 |
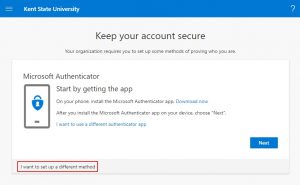
| 16 | To register Microsoft Authenticator (recommended), Click Next.
To register Phone number, Click on ‘I want to set up a different method’ – shown in red box. Go to Step 20. |
 |
| 17 | Method 1:
Microsoft Authenticator App On your smart phone – Download and Install the latest version of the Microsoft Authenticator app (recommended). |
Android – Scan QR Code.Or go to Google Play to download and install the Authenticator app.
Apple iOS – Scan QR code |
| 18 | Click Next on the browser windows.
Open the Microsoft Authenticator app on your smart phone, click ‘+’ and select ‘Work and school account’
Click Scan QR Code
|
|
| 19 | Scan the QR code on your browser window from your Authenticator app on the phone.
Click Next on your browser window. Note: the QR code on right is unique for each account. Do NOT scan.
You should be prompted on your phone to do the number matching. Click Yes on the phone after entering the numbers from the browser. Click Next to register your device.
You should see Success! |
|
| 20 | Method 2:
Phone\SMS Select Phone from the drop down menu and Confirm. |
|
| 21 | Select your country and enter your phone.
Note: You have option to select other countries besides United States. |
|
| 22 | You will receive an SMS with a 6 digit code (or called to verify).
Once you enter the 6 digit code and click Next, you will see a successful registration message. |
|
If you need to delete or change default device.
| 23 | To delete a device. Click on ‘Delete’ (to the right of registered device)
To change default sign-in method, click ‘Change’. Select from the drop-down options. |

|